Google Analytics Setup for Hugo
hugo blog
This article is a quick guide on setting up Google Analytics for websites built with Hugo. The website you are on right now is built with Hugo, and I had recently setup Google Analytics after a little bit of hassle. I thought of documenting this in the hope that someone else finds it useful and set this up without any of the struggle 😄 Without further ado, let’s get started.
1. Getting a Google analytics tracking ID
( If you have the tracking ID setup already, jump to Step-2 )
Sign up with Google Analytics if you haven’t already, and this account is needed before we proceed with the subsequent steps. Once you have set up your google analytics account, you need to create a tracking ID, by logging in and performing the following steps:
- Click on
Adminlink on the bottom-left corner of the page - Click on
Create Accountbutton on the top-left side of the page- ‘Account setup’ section: Enter the account name, and leave all the boxes checked
- What do you want to measure: Choose the
Weboption - Property setup: Enter appropriate data for
Website Name,Website Url,IndustryandReporting timezone
- Click the
Createbutton, and accept the terms and conditions
After the completion of these steps, a page containing your tracking ID will show up. Copy the tracking ID, and we will use it in the next step to add to your Hugo site.
ng
2. Adding the tracker to your site
The easiest/fastest/recommended option to add the tracker to your site is by using Hugo internal template. The first thing you will have to do is to add your Google analytics tracking
ID to config.toml. Add your tracking ID from Step1 to this config file. The following is a snippet from my site’s
config.toml. Be sure to add your tracking ID (and not copy paste the one mentioned below)
| |
The next step is to add the following snippet of code (which we will refer to as Google analytics template) to your
blog.
{{ template "_internal/google_analytics.html" . }}Now, where you add this depends on how your code is organized, and whether you are using a custom Hugo theme.
I haven’t installed any theme for my site, and have organized the site into partials for header, footer, navbar, etc. I have named my partial as header.html, and it’s placed at
the following location:
blog_root/layouts/partials/header.htmlIf you have a custom theme installed, you should ideally find the header partial in the following location:
blog_root/themes/<THEME_NAME>/layouts/partials/header.htmlThere are chances that the theme developer named it differently like head.html). You just need to figure out the file
containing the html head tag.
Once you have located the file, you need to edit the header partial to add the above mentioned Google analytics template. It’s a 1-line change, and this is what mine looks like after adding the Google analytics template (Highlighted line 5 refers to the corresponding code):
| |
Testing the changes
Now it’s time to check if hits to your website are being captured and tracked by Google analytics.
Start your hugo server locally using the hugo server -D command, and load your site home on the browser (The
default url on localhost http://localhost:1313 - If yours is different, use the appropriate url)
Open Google Analytics on a different tab.
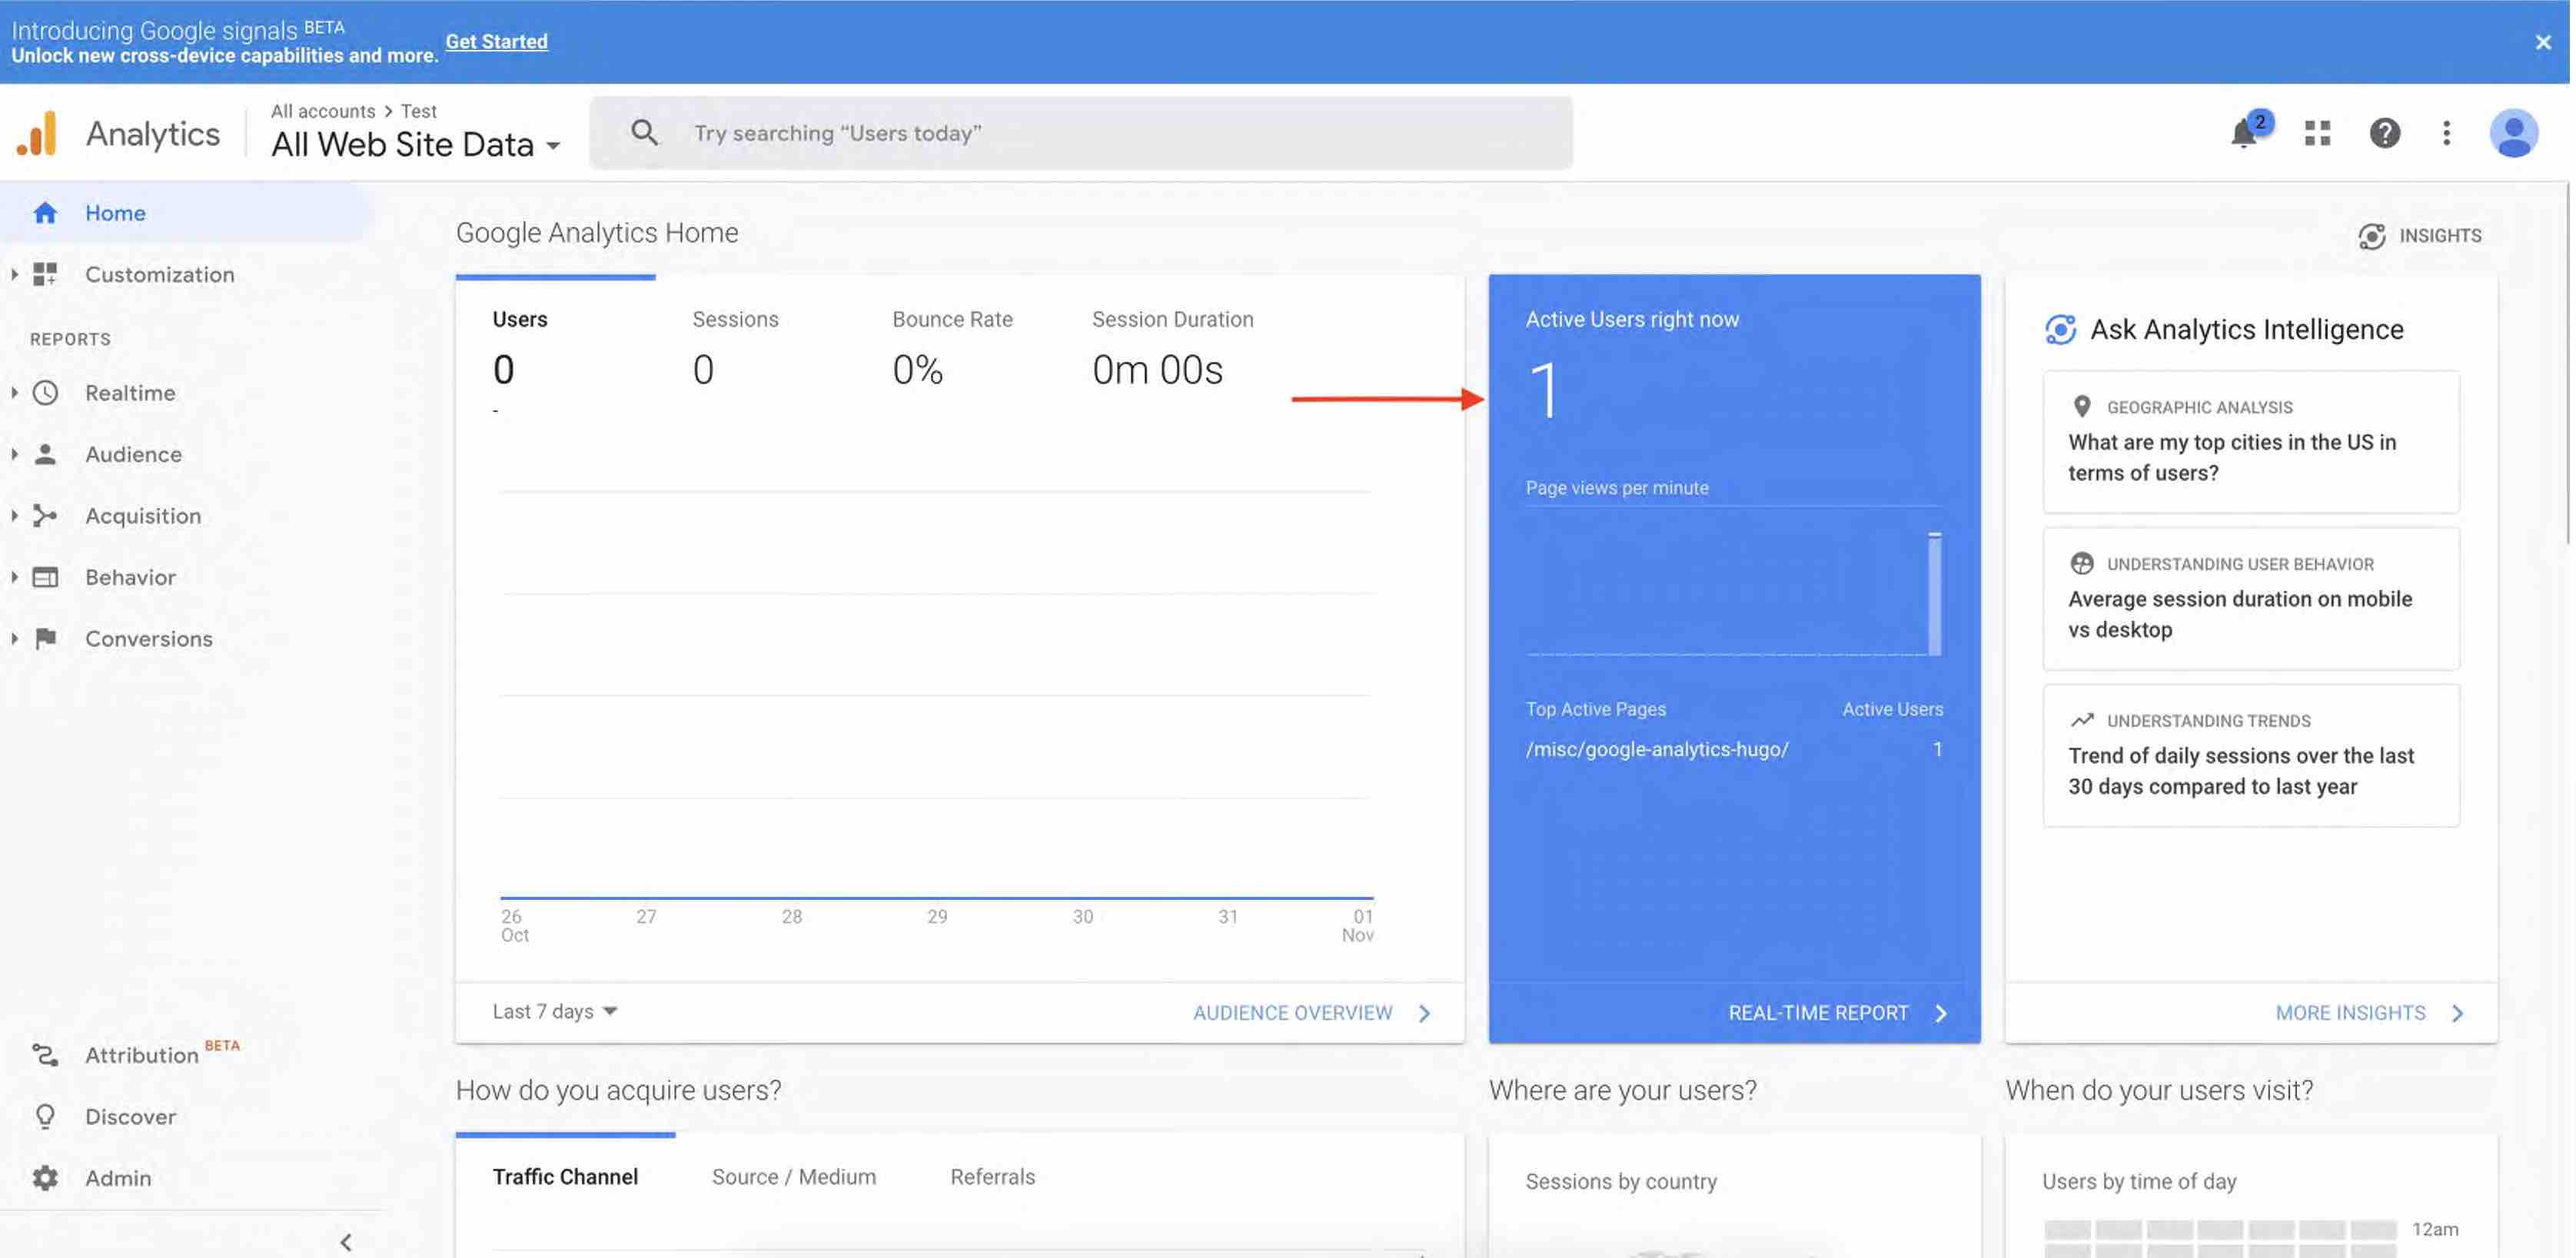
Now, on the Google analytics dashboard, you should be able to see the number under the section Active Users right now as 1 - This corresponds to the page you just loaded from the hugo server started locally.
Where do I go from here?
Now you are all set up with Google analytics for your site, and you should be able to track visitors to your site
(Yayyy!). But this data includes the visits you make to you your site as well (For eg. You when you trying to test your
site locally, by running hugo server on your computer, or when you are trying to debug something on the live site
). Ideally, you would want to filter this out since you are only interested in tracking other users visiting your
site, and counting your own visits isn’t the best way to get correct picture of your site’s traffic. I will write
an article on how to filter out such traffic, be should to read it and incorporate to your code, if you feel it’s
worthwhile.
Conclusion
This post explained about the different ways (Hugo internal template vs custom partial) to enabling Google analytics on your Hugo blog. I hope you found this post to be useful. Please do let me know in the comments, if you see any issues while following the steps. I’ll be happy to help out.